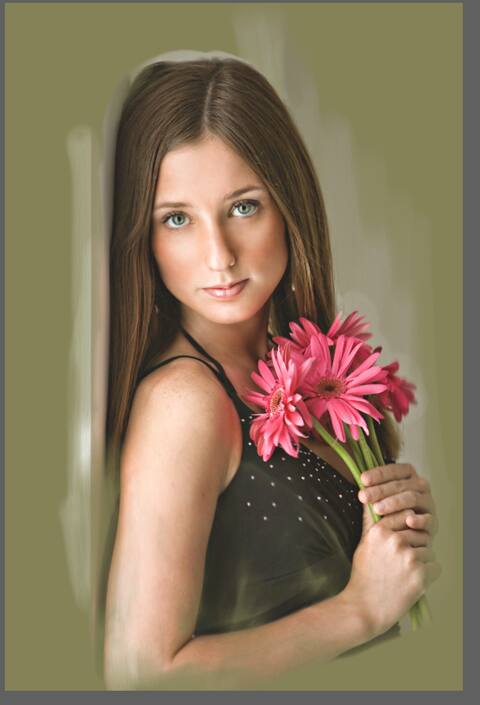
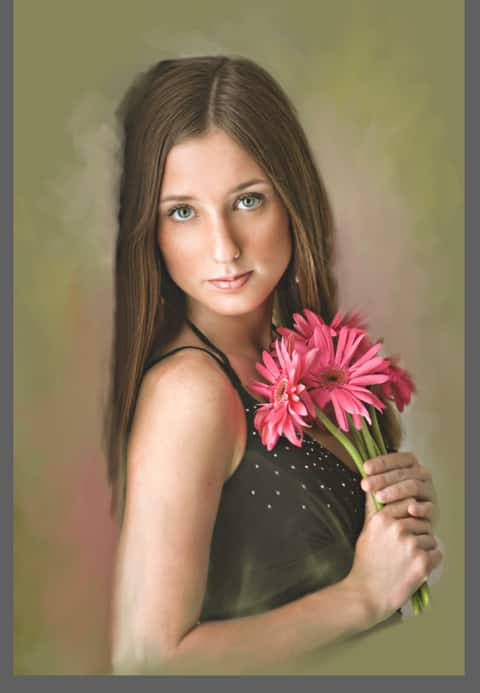
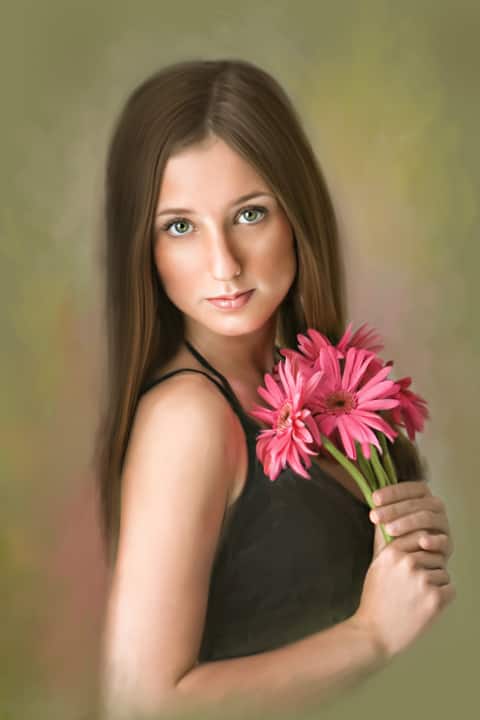
Image by Lonnie Hoke
www.LHoke.com
Before entering Corel Painter, make sure you've performed the necessary color corrections, and retouched and resized your image.
Then, import your image as a JPG, at no larger than 300 dpi (dots per inch).
We'll be working from a "Quick Clone" to save time. Cloning is one of Corel Painter's most powerful features that, when used correctly, can allow you to create breath-taking masterpieces without having any previous painting experience.
We'll take the following steps:
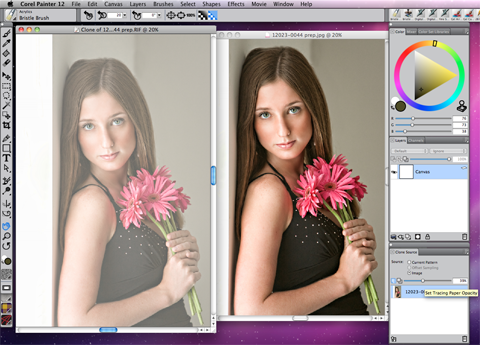
1. Open image.
2. Choose File > Quick Clone.
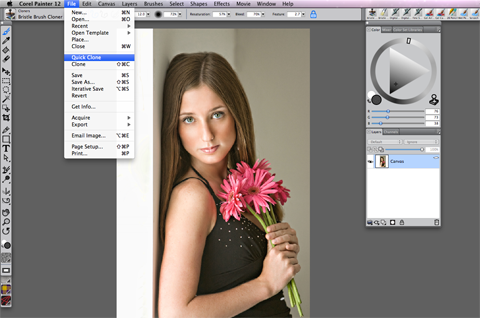
3. Choose File > Save As.
Save as an "Uncompressed" RIFF file. I've added "1 ptr" to the file name, to remind myself that it's stage one in Painter.
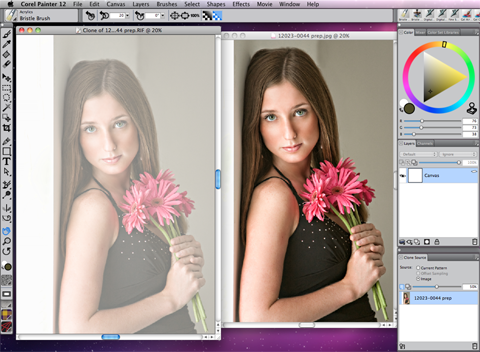
You can view your original file without having to toggle to the actual document by pressing CTRL "T" (Windows®) or CMD "T" (Mac OS®) on your keyboard, or by clicking the Tracing Paper icon in the Clone Source panel. You can also hide it by pressing CTRL/CMD "T". The Clone Source panel will also allow you to adjust the tracing paper opacity using the slider. On the Layers palette, you'll notice that the image does not display in the layer. That's because it's a ghost image that is used for tracing purposes only, so the layer is actually blank.
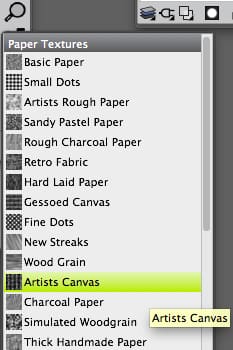
4. In the Toolbox, choose Artist Canvas from the Paper selector. This allows the artist canvas texture to show through.
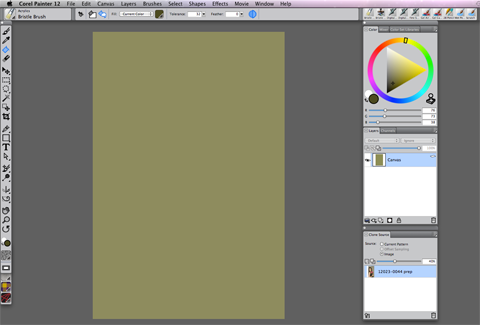
5. Choose a color to lay down as your canvas ground. I've chosen a muted yellow green sampled with the Dropper tool from the mid-tone region of the flowers. In order to sample color from the original image, open the original file again and use the Dropper tool to sample color. On the Colors palette, I pushed the color towards the gray area of the triangle. Fill the canvas by using the Paint Bucket tool. Your canvas should be a solid color at this point.
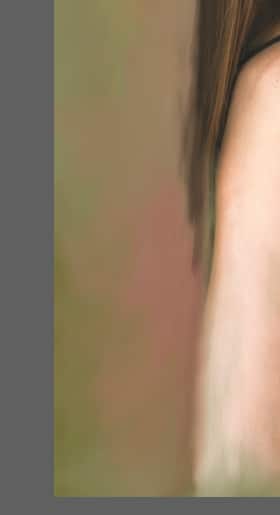
When I'm working on paintings, I always work with a canvas ground color selected from some mid-tone region in the image to achieve color harmony. I then clone the subject, while keeping as many details as possible, but erasing the photographic pixels showing through in the final painting. I then proceed to paint the background space and work my way into the face and hair. I clean up the hair/background edges to finish the painting.
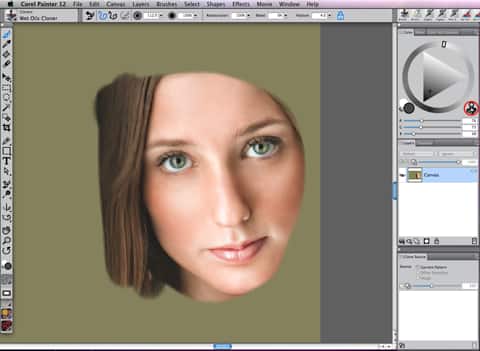
6. On the Brush Selector bar, choose Cloners from the Brush Category list box, then choose Wet Oils Cloner from the Brush Variant list box. Use the brush to clone detailed information from the image.
Settings:
Make sure to use the brush as a cloner, not a color brush. To switch to the clone color mode, click on the Clone Color button in the color palette. If it's grayed out, you're cloning. To switch to using the full-color brush mode, click the Clone Color button again.
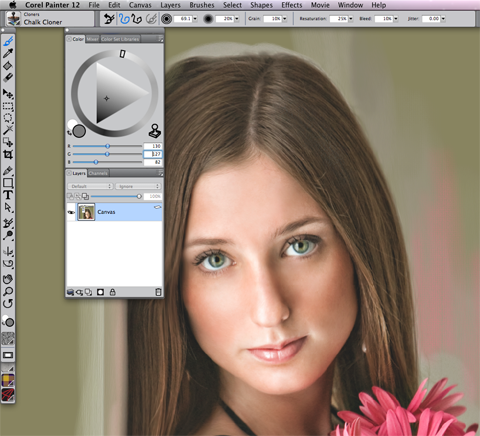
7. Let's Paint some color into the background with a Chalk variant. Choose the Chalk Cloner brush variant from the Cloners brush category. Use this brush in full-color mode.
Settings:
Use the Dropper tool, or press "D" on your keyboard, to sample a color from the existing image, and then add a bit more saturation to the color by using the Color palette. This makes the color ‘pop'. To ground the subject, I focus the darker colors on the bottom left, and then pull pinks from the flowers (subtle, not over-the-top hot pink) to generalize the color in the overall image. Using a soft pink will immediately direct the viewer's eyes from the flowers to her skin tones.
8. Let's blend our paint using the same brush, but set the Resat value to 0 so the brush becomes a blender.
Settings:
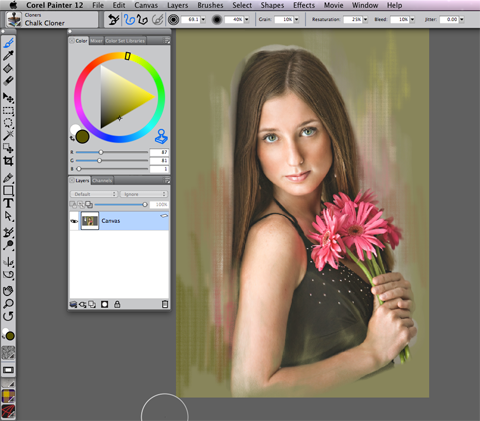
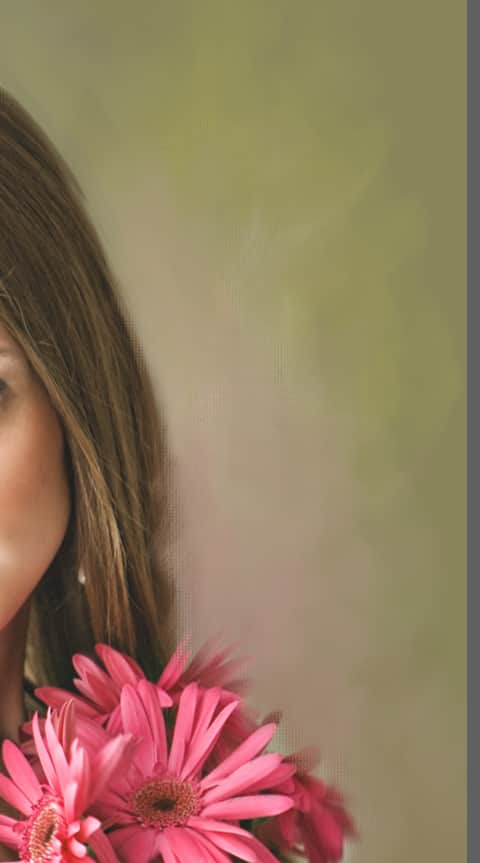
9. To add some interest, we'll blend the background with a new brush. From the Cloners brush category, choose the Flat Oil Cloner variant. This brush lets you achieve a bristly oil look.
Settings:
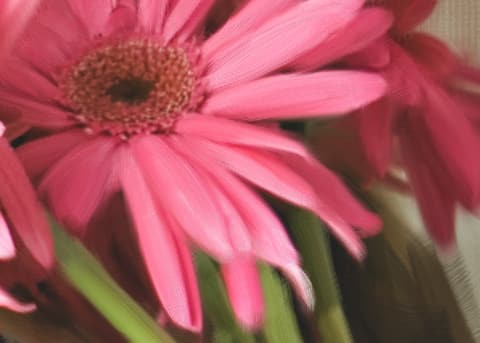
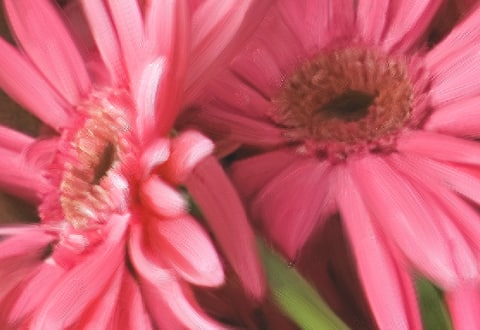
10. Paint following the direction of the petals, and keep your brush size a bit smaller than the area you're painting.
Choose the Camel Impasto Cloner brush variant from the Cloners brush category. Use the brush in cloner mode.
Settings:
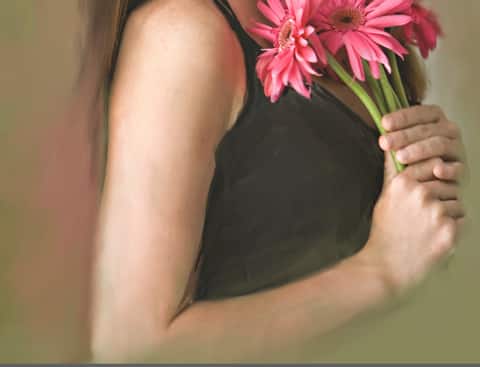
11. Following the same concept, paint the planes of the dress. I've painted out the crystals because they were distracting. Choose the Flat Oil Cloner brush variant from the Cloners brush category.
Settings:
12. If you need to smooth the edges, click the Clone Color button in the Color palette to switch to the full-color brush mode. You can then blend the edges (remember, the Resat value is set to 0).
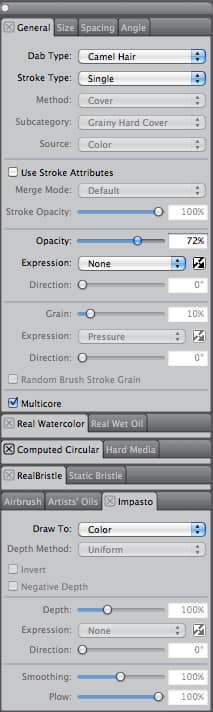
13. Now we'll paint the skin and hands, working our way to the neck and face using the brush. Choose the Oil Brush Cloner brush variant from the Cloners brush category.
Note: When using the Oil Brush Cloner, it is important to remove the "Impasto" feature so the skin doesn't appear "scratchy". To remove Impasto, click Window > Brush Controls > Impasto. In the Draw To list box, choose Color. If you set the Impasto settings to draw only color and the effect still appears "scratchy", you can modify the color mode. To do this, open the Color Library Options menu in the upper-right corner of the Color palette dialog box, and choose Display as HSV. In the Color palette dialog box, move the V slider to the far left to set the value to 0. This is your variability feature.
Settings:
We'll start with a large brush and work along the planes, towards the arm, and into the neck.
14. Paint the hands with the same brush, but remember to lower the Feature value to 2 or 3. The Feature value controls the spacing in between the bristles in the nib of your brush. A high Feature value increases the space between the bristles and produces a more "scratchy" brushstroke. For smaller areas, it's usually best to set a low Feature value.
15. To finish the hands, I switch to the full-color mode (instead of the cloner mode. ) I also set the Resat value to 0, and blend the fingers. Again, keep your brush smaller than the area that you're painting.
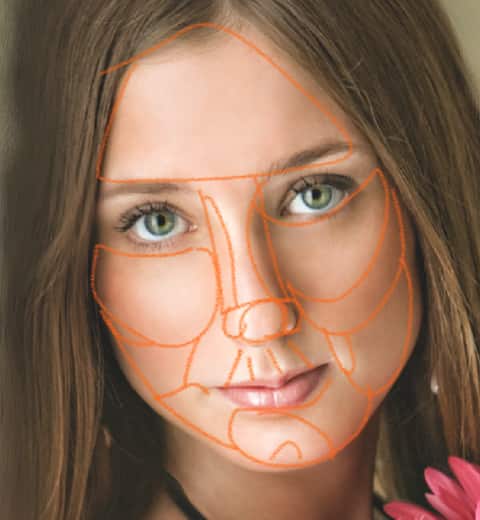
16. Now let's tackle the face. An important rule to remember here is that your Resat controls the accuracy of your brush when it's in clone mode. If your Resat is set to 100, then you are picking up 100% accuracy from your clone source file. If it's at 0, then you have 0% accuracy pulled from your source file.
Choose the Oil Brush Cloner brush variant from the Cloners brush category. Now we'll start applying brushstrokes to the cheeks and forehead with a large brush (about a third of a size smaller than the cheek area – similar to the size of a makeup blush brush. )
Settings:
If you aren't feeling comfortable with the Resat only pulling 15% accuracy from your source file, feel free to take it up to 30-45.
17. Following the planes of the face, brush light, feathery strokes to cover her cheek and forehead area. Take your feature smaller as we approach the chin and nose area. If you blur your own eyes, and look at her face as a set of shapes and planes, you'll be able to paint more realistically. The key here is to paint along those planes and not just make random strokes.
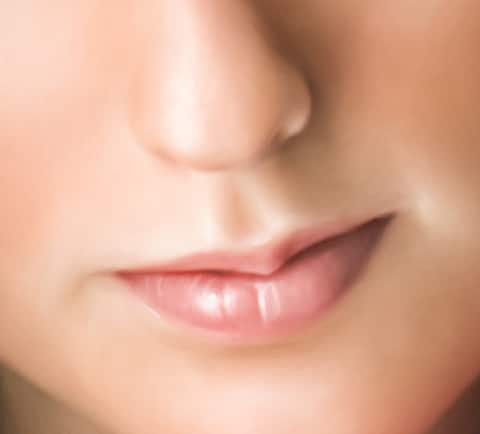
18. As we approach the lips, I continue to take my Feature down even smaller to 1-1.5. I'm following the contour of the lines in an almost circular motion as lips are never straight up and down. Make sure not to over-paint the highlights as this may change the shape of her lips.
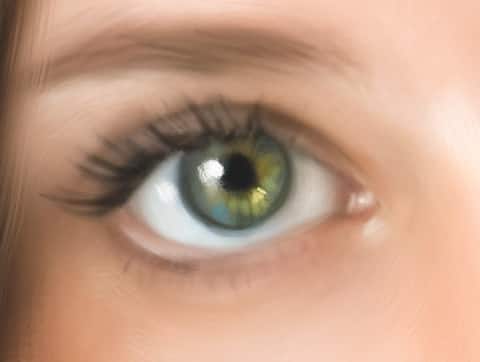
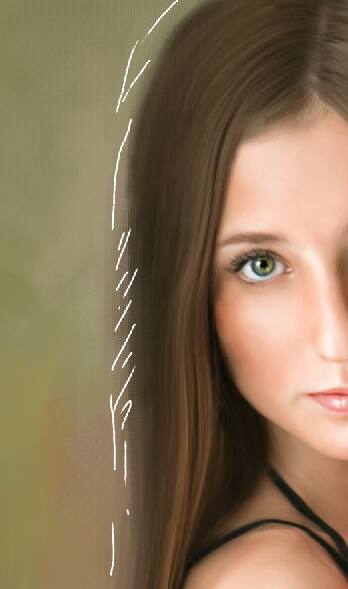
19. Eyes - breathe for this part! It's not as hard as it looks. Using the same skin brushes as a cloner brush, we'll take the feature from 1-2 and lightly brush out any photographic details in the eyes to make them more ‘painterly'. Follow the lines in her eyes, and remember that eyes are round. If you take out eyelashes, that's okay.
20. Let's add color to the eyes. To do this, you need to switch from the brush clone color mode to the brush color mode by clicking the Clone Color button in the Color palette.
Settings:
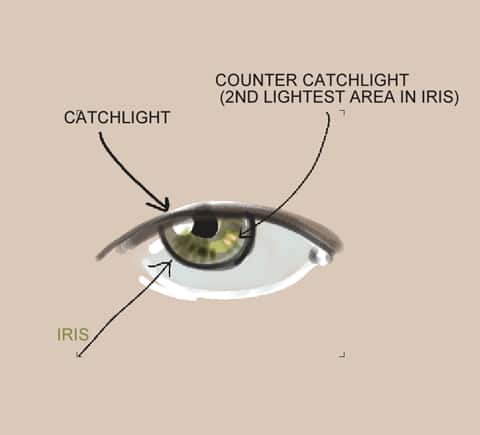
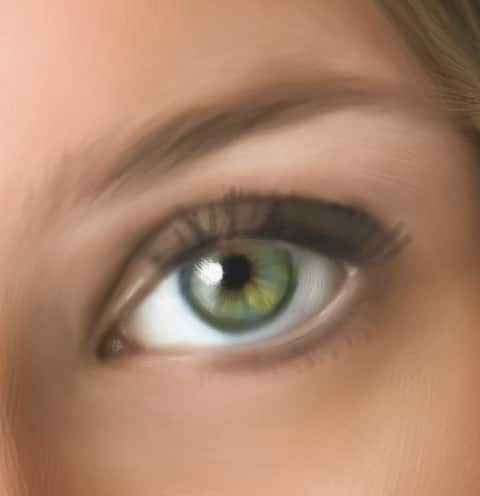
21. I've painted black into the iris, and bright white into the catchlights. Since the eyes are wet and round, they reflect light. Your counter catchlight will reflect the opposite of your catchlight. That will be the second brightest area in the iris. Do not paint a light ring around the entire eye — this is not natural. Using the Dropper tool (or press "D" on your keyboard) I select a color from the existing eye, and then boost the color a bit by adding more pigment using the color wheel. Press "B" for the brush and then use the color to apply light brushstrokes.
22. Eyelashes - let's remember to stay realistic! Look at your source file. She has lovely lashes that start from the inner parts of her lids, and then swoop in a circular motion outwards. Using the same brush, with the Feature at 1, sample a dark color and add eyelashes. Don't overdo this section. If at all possible, try to only do one round of eyelashes versus constantly going over the same area again and again. Keep it simple.
23. To achieve a realistic oil appearance, I use the same brush that I used for the skin, but increase the Feature value to approximately 4-6. Then, I paint light hints of color into her skin. Again, I sample colors already present and then bump them up either towards the white or towards the color tip (right tip of pure color) on the color wheel. We're only adding hints of color to her cheeks, bridge of her nose (highlights), and color into the shadows. I also added a bit of additional color to her bottom lip, and enhanced her "angel's kiss" the area between the top lip and nose.
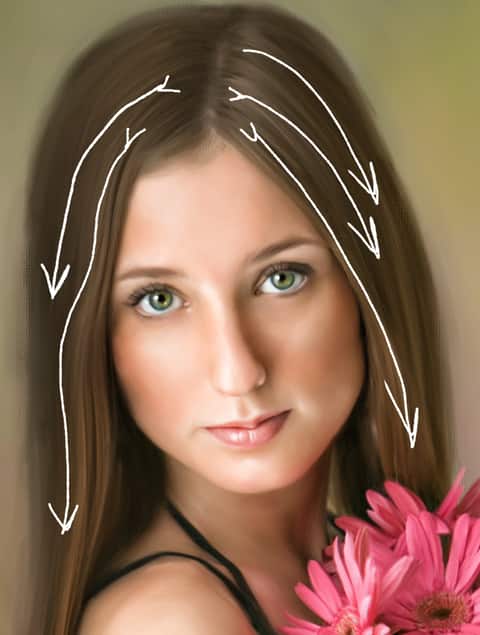
24. Hair - we'll start by choosing the Oil Brush variant from the Cloners brush category. Use this medium brush to clone her hair by following the direction of the hair.
Settings:
25. Then we'll take the Camel Impasto Cloner brush and lightly add some more texture into the hair.
Settings:
26. To apply the finishing touches to the hair, choose the Chalk brush variant from the Cloner brush category. Use the brush in full-color mode to add some highlights to her hair.
Settings:
I'm selecting hair highlight colors, and them making them brighter on the color wheel and lightly laying down strands of hair with this brush. Again, keep it simple, keep it light. If you need to blend it, take your Resat to 0.
27. Taking our Resat to 0, let's blend the areas where the hair meets the background and clean up the image.
Voila!