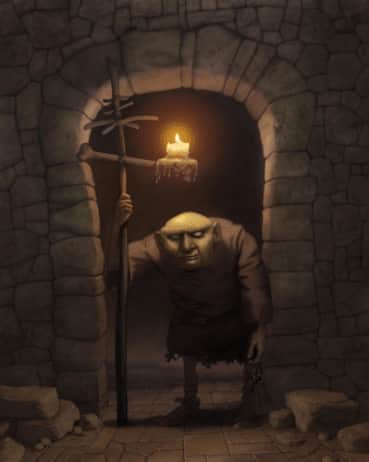
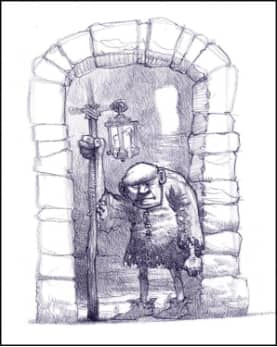
In this painting I have taken a drawing from one of my sketchbooks.
There are advantages and disadvantages using these sketches as the basis for paintings. One advantage is that I have more ideas doodled than I can possibly ever paint. A disadvantage is that these are just rough ideas in most cases and not developed enough to be a taken directly to a finished painting. I end up designing and painting on the fly working this way which leads to a lot of changes, rethinking, and repainting as I go. This takes more time and effort than a carefully planned painting. However most of these paintings are for pleasure and they give me a reason to experiment with new techniques and methods.
The idea for this doodle was essentially a doorman or concierge at an expensive hotel but in this case, he is at the local dungeon. The initial sketch is done with a colored pencil on a 8.5" x 11" piece of paper. The drawing is scanned at 200 dpi, saved as a PNG file, and opened in Corel Painter 12.
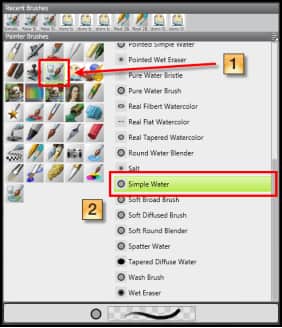
The first thing I do is get rid of the white in the image. White is distracting, all colors look dark on white, and large areas of white can lead to a painting with poor value relationships. I use a variety of ways to get rid of the white in the initial sketch. With this particular painting I used one of my favorite brush categories in Painter, Digital Watercolor. Digital Watercolor covers your image with transparent colors allowing you to quickly establish color and value harmonies. Unlike traditional watercolor, you can paint back into the Digital Watercolor with a light color and replace any darker passages. You can interactively adjust the wet fringe and diffusion of the strokes. I like how the strokes will diffuse into the currently active paper texture. I quickly establish a color scheme and value range in the painting using the Simple Water brush.
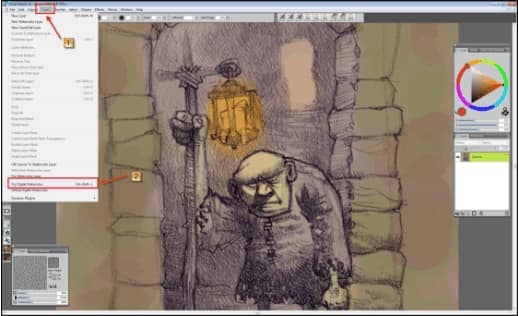
Once the original colors and values are painted, I dry the Digital Watercolor layer in the Layers menu.
Once dried, no additional adjustments will be possible to the Diffusion and Wet Fringe settings.
I repeat the process several times drying the Digital Watercolor each step until I am satisfied with the color and value of the painting.
Now that I have my color scheme and values set, I start painting on the image. I use a variety of custom and default Painter brushes as well as custom and default Painter Papers.
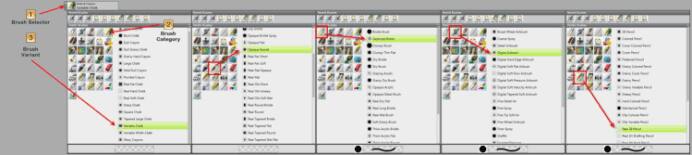
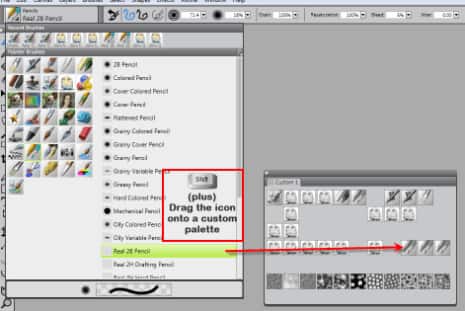
Some of my favorite default brushes are Chalk and Crayons/Variable Chalk, Oils/Opaque Round, and Acrylics/Captured Bristle, Airbrushes/Digital Airbrush, and Pencils/Real 2B Pencil.
These default brushes along with custom variants of them are the main brushes used in this painting. I will hold down the Shift key and drag the individual brushes as well as paper textures into a custom palette. This makes accessing them as I paint quicker.
I start painting in additional details and changing parts of the original sketch. Here I have added the floor cobblestones, added and detailed the stonework around the door arch, changed the staff holding the lantern, eliminated the background door, and raised the shoulder of the character. Many more similar changes will be added as the image progresses. At this point much of my color has already been set and I use the dropper tool picking colors mainly from within the existing image.
I continue to refine the character, his staff, and the environment making changes as I paint. In addition to refining and making changes to the image, I also:
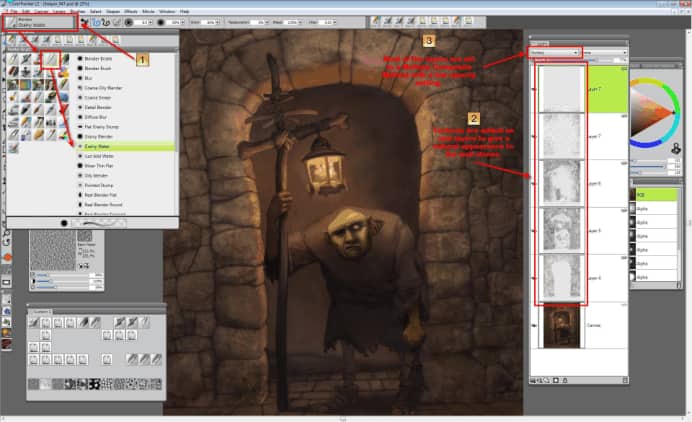
1. I use the Blenders/Grainy Water brush at 30% - 50% opacity to blend colors and edges together. This blender is one of my favorite interacts nicely with Paper texture.
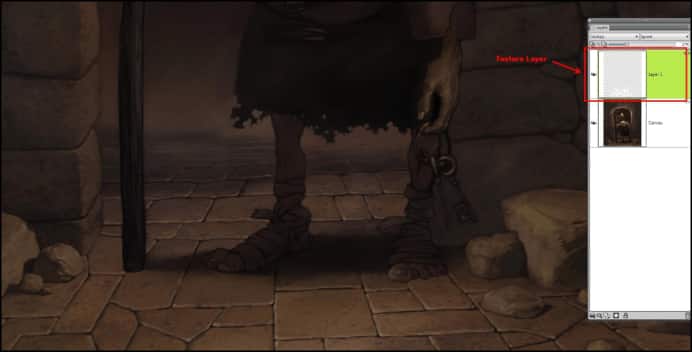
2. Textures are added on new layers to give a natural appearance to the wall stones.
3. Set the Composite Method of the texture layers to Multiply and reduce their opacity significantly. I use the Eraser tool to remove the texture from the character, lantern, staff, and background behind them.
When the textures are like I want them I will do an Iterative Save (Ctrl + Alt + S), drop the texture layers onto the canvas, and do another Iterative Save. From the beginning of every painting I use the Iterative Save feature in Painter 12 to create a sequential backup of each image. I will save before I make a major change to an image, after a major change, and about every 30 minutes. It is not uncommon for me to have around 100 different saved versions of every painting.
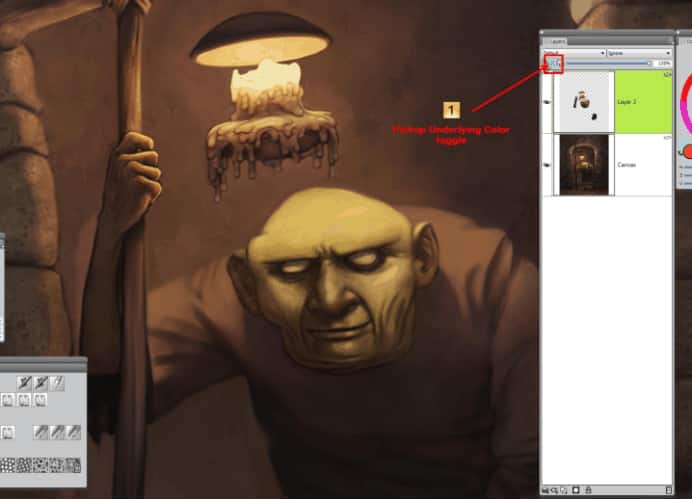
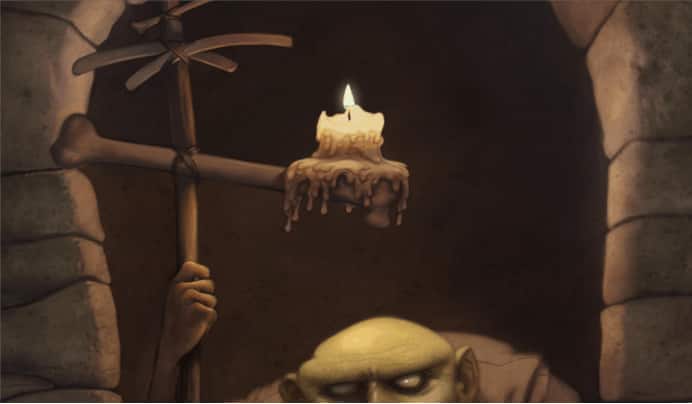
Now I spend a great deal of time refining and changing the figure. Up to this point much of the painting on the doorman has been experimental in nature. I am going for the final look of the character. I will also add a few extra touches like a key ring full of skeleton keys and change the lantern to a candle. Most of the painting is done with the Opaque Round brush on a new layer. When painting on a new layer I make sure that I have the Pickup Underlying Color toggle turned on so my strokes blend smoothly with the canvas colors. When turned on, the small dropper icon is blue.
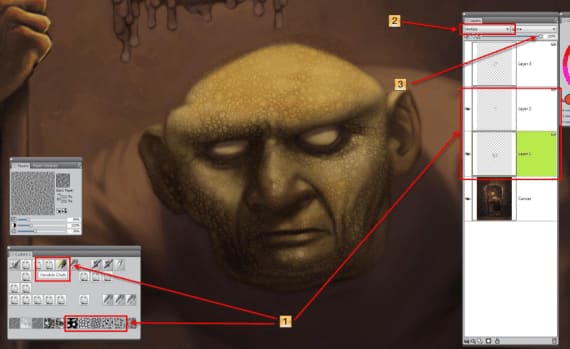
Since this doorman living in the dungeon probably would not have great skin I want to add some texture to his head and hands giving him more appropriate appearance.
I paint the skin textures this way;
1. Using the Variable Chalk brush, a variety of different paper textures, and creating new layers I paint texture loosely over the skin areas with a colors slightly darker than already present.
2. I change the Composite Method of these new layers to Multiply.
3. I lower the opacity of each layer to what I feel is appropriate. In the image, the texture is at 100% opacity so it is clearly visible.
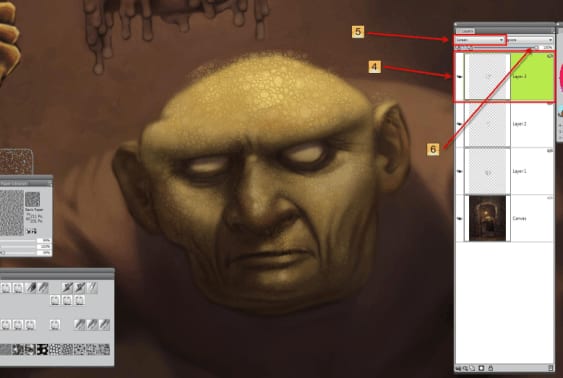
4. I create additional layer/layers, invert the same paper texture, and paint again on that new layer with a slightly lighter color.
5. I change the Composite method of the new layer/layers to Screen.
6. I lower the opacity of each layer to what I feel is appropriate.
Creating skin textures this way is very effective and can be as subtle or obvious as wanted.
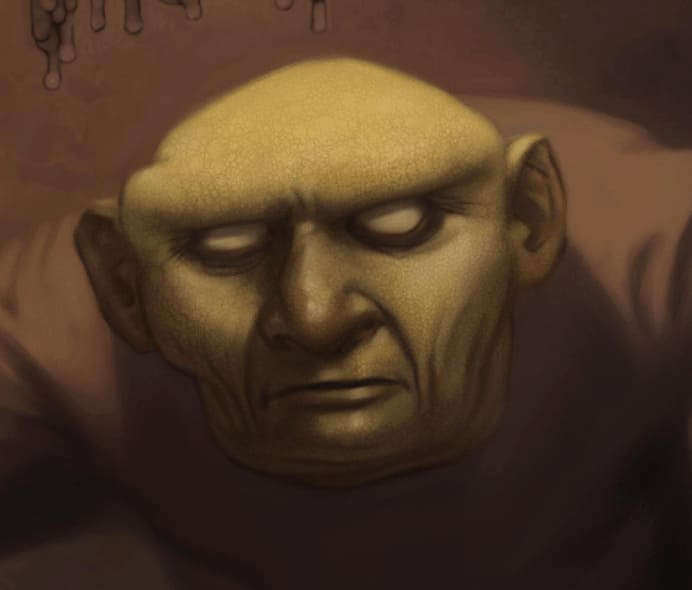
Finally, I will erase each layer to clean up any of the texture spilling over into the background. The doorman now has a nice grungy texture appropriate for any self-respecting dungeon dweller.
The character would look a bit strange with a nice textured skin but a smooth costume. The solution is to add a rough fabric texture to his attire. The same method is used to add that texture as was used to add texture to the skin.
The painting is for the most part finished at this point. There are just a few things to complete.
Since most dungeons are not the cleanest places some rubble and texture will be added on the floor. Finishing touches to the cobblestones will be done at the same time to give them some dimension. A new layer is created for the rubble and finish work on the cracks. Both the rubble and cracks are painted using a combination of the Opaque Round and Variable Chalk brushes. Light and dark colors are picked from within the image.
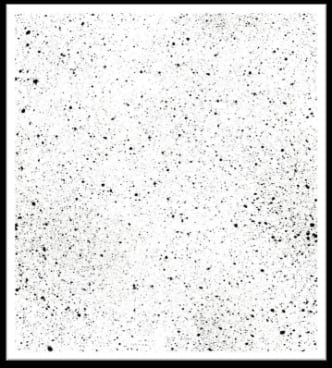
A second image of splatter texture is opened, copied, and pasted over the canvas.
The texture was created by flipping ink at some paper using an old toothbrush. The resulting texture was scanned and saved for future use. These types of non-specific assets are valuable to create and save because of their almost unlimited use while creating digital art.
The texture layer is transformed so that it covers only the floor portion of the painting and its Composite mode is set to multiply. Parts of the texture that cover anything other than the floor are erased. The opacity of the layer is lowered to 27% and a slight Focus/Soften is applied from the Effects menu. The resulting texture adds additional dimension and believability to the painted floor.
The same texture and technique is used again to add some roughness to the rubble itself. Any texture that is outside the edges of the rubble is erased. The image is iteratively saved. The texture layers dropped and the image saved again.
A new layer is created and a small candle flame is painted on the top of the candle. The flame layer is duplicated. The bottom flame layer is softened, the composite method changed to screen, and the opacity lowered to give a nice subtle glow to the flame.
The last thing to do is add some glow around the candle generally.
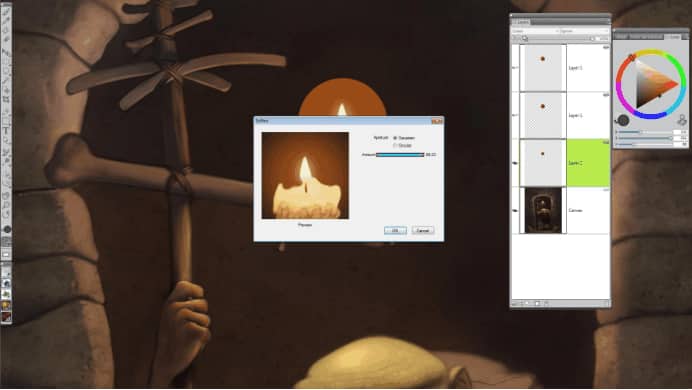
Adding some candle glow is as simple as;
1. Creating a new layer.
2. Add a small circular selection around the candle on the new layer.
3. Fill the selection on the new layer with a darker orange color.
4. Deselect and duplicate the new layer three times.
5. Scale one of the layers to about 75% its original size.
6. Change the Composite Mode to Screen.
7. Focus/Soften the layer. Use the highest setting possible.
8. Select the second layer and change the Composite Method to Screen.
9. Soften the Focus of this second layer at the highest setting.
10. Apply the Soften effect two more times.
11. Adjust the opacity so the layer fades smoothly into the background. The screen Composite mode will amplify the first glow layer.
12. Select the third layer.
13. Scale the third layer so it is twice as large as the original.
14. Change the Composite Method to Screen
15. Soften the layer at the maximum setting three or four times.
16. Lower the opacity to enhance the glowing effect of all three layers on top of the candle. The opacity setting is strictly a personal preference.
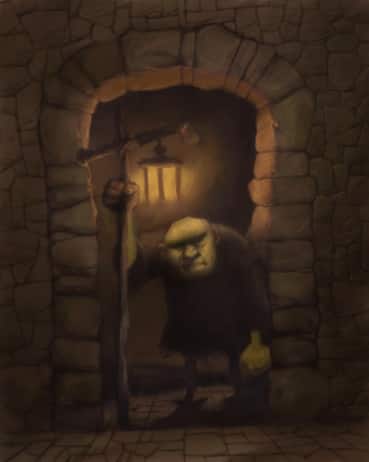
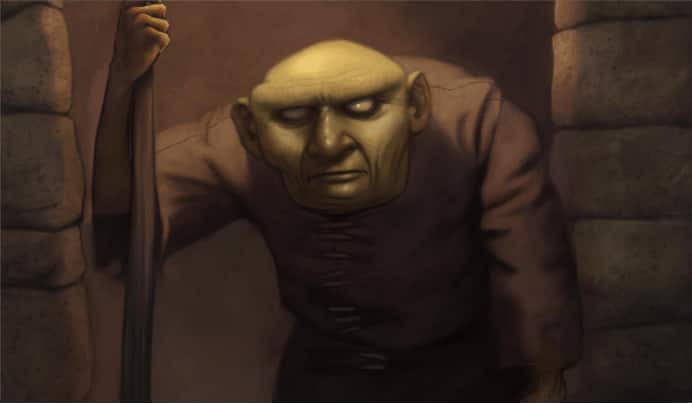
The image can now be considered finished. Save again, drop all the remaining layers, save once again for the final. The resulting image will look something like Figure19