Follow these steps to paint your own comic book page in Corel® Painter™ 12.
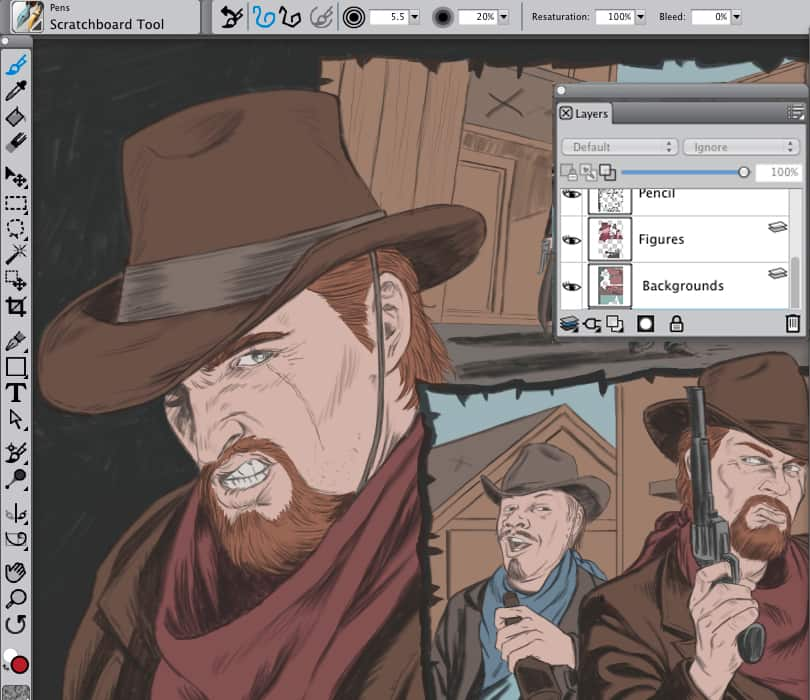
Before painting the penciled page, you need to apply flat color to all the shapes and forms, such as figures and architecture, so it is easy to make selections while painting. Start by taking your finished pencil layer and changing the composite method of the layer to Multiply. Create a new layer below the pencil layer and name it Figures. Choose a color for the flesh and use the Scratchboard tool (opacity 100%) and color all the places where that color will reside. Do the same to the hats, jackets, boots, pants, etc. This layer should be exclusively for figures on the page only.

Repeat the same technique on another layer named Backgrounds. This will include only images of the background and not figures.
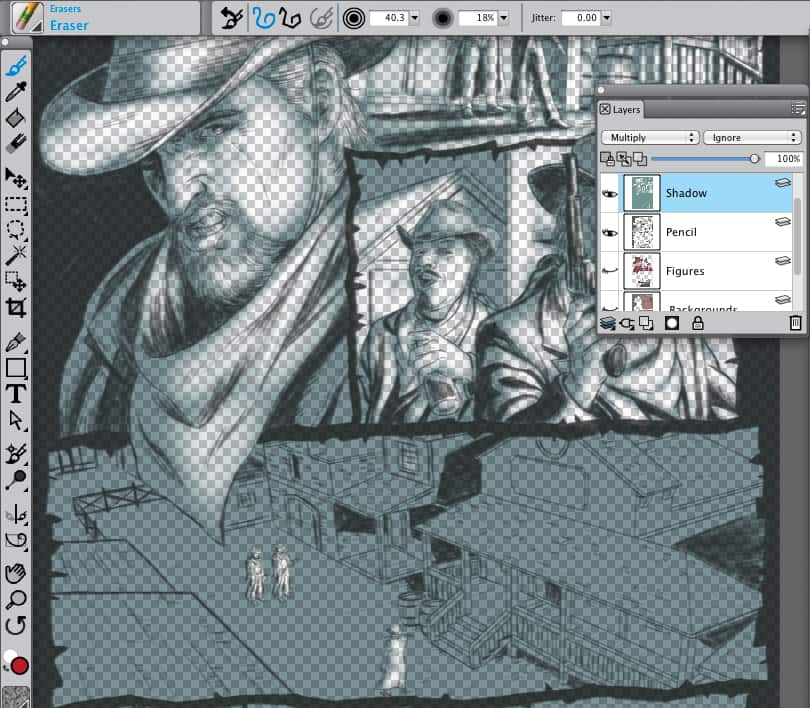
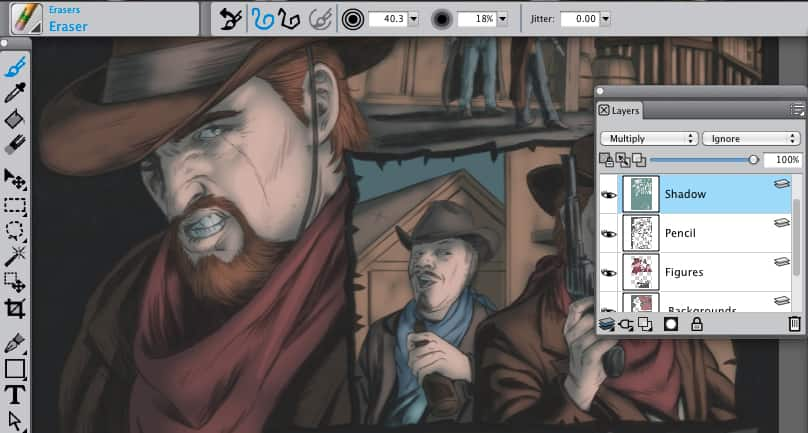
Once you have applied color to all the figures and backgrounds, you are ready to add a layer for shadows. Create a new layer on top of the two flatted color layers and the pencil layer, and name it Shadows. Change the composite method of that layer to Multiply. Fill the entire layer with a grayish blue, which will darken all layers underneath. Now select all the contents of the figures layer and, using the Eraser (opacity 20%), erase areas of the blue layer where light would hit the figures.
Once you have finished with lighting the figures, select the background layer and unselect the figures. Now you can light the background architecture. Be sure to keep the lighting of the figures consistent with the environment.
Once you have given your figures and environments lighting, it is time to render and paint in highlights, and render away the pencil line work.
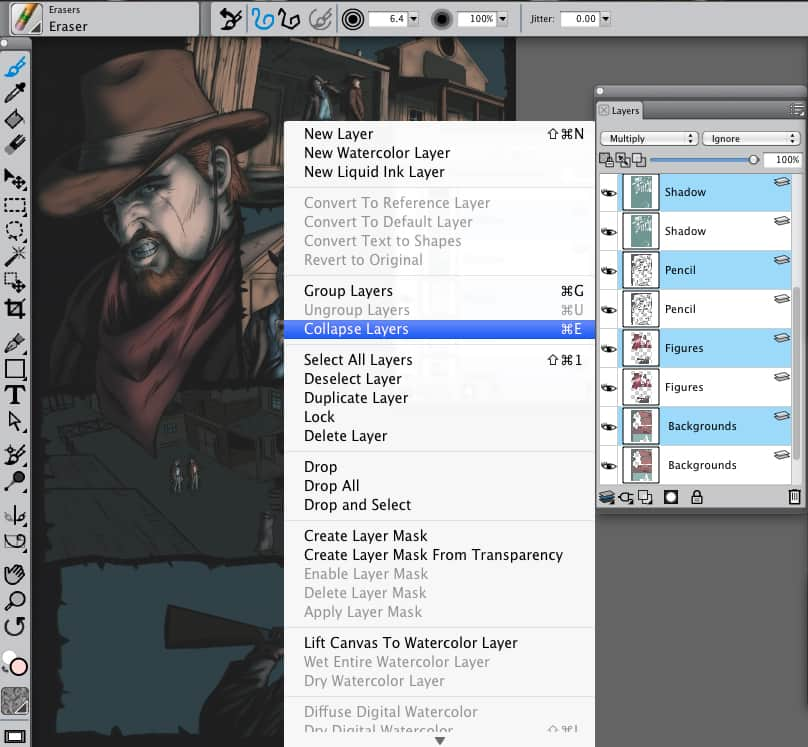
Start by duplicating all of your layers. Next, take the duplicated layers and Collapse them into one layer. Keep all of your previous layers for selection purposes. Label this new layer Painting. Now start to paint on top of this layer, adding lighter values and highlights. One of the brushes that is helpful for blocking in lighter values and quick details (as seen with the environment buildings) is the Sargent Brush.
The more detail you put into the environments at this stage, the more believable and interesting your finished page will look. The Impressionist Brush does a good job bringing in a surface texture to the dirt ground. Size this brush down as the ground plane recedes back in space to enhance the illusion.
When painting faces, use softer brushes to add lighter flesh tone values. Creases in facial features can be dealt with delicately using brushes such as Real Oils Smeary. Use your pencil line art to blend with the surrounding facial colors. A good brush for painting in thin wisps of facial hair details is the Scratchboard Tool.
Another useful brush that helps with painting fabric or just blending pencil shading with surrounding color is the Grainy Water Blender. Adjust the Resaturation feature of the brush to add or take away color as you wish.
To add drama to the last panel of the Skeleton Rider, I want to light the character from the rear to help push the silhouette. Using the Sargent Brush, rough in where the light would hit the character.
Then using the Grainy Water Blender with the resaturation at 0%, you can blend the lighting color to wrap smoothly around the forms. I also wanted to add the moon in this panel and moonlight hitting the character on the opposite side.
To paint in clouds, select the area around the Skeleton Rider and create a new layer and label it Clouds. With the Scratchboard Tool, roughly paint in clouds.
Now take the Sargent Brush, lower the opacity to 0% and brush over the clouds to make them wispier. Then use the Blur tool to soften and blur the clouds just enough to push them back in space.
Give a bit more separation to your panels by adding some cool side lighting. Use a smaller diameter Grainy Water Blender brush with resaturation at about 30 – 60% and brush in some cool blue rim lighting opposite the warm light of the figures. This will help bring the figures forward, separating them from the background.
The final step to is to punch up the brightness and contrast of the entire page slightly. Go to Effects>Tonal Control> Brightness/Contrast and adjust it so the darks are 10 – 15% darker and your lights are 5 – 10% lighter.
This will make your page just a bit stronger.


